Category Archives: Uncategorized

I’ve settled on a “stock” bread recipe

I kind of got bored with sourdough bread, and I’m not the one who really likes it, so the starters have died off and I haven’t made any sourdough bread in over a year.

I was looking for a bread recipe that would be easier, but still great to eat. My brother-in-law, Larry, just loves my bread, so I bake weekly to keep him supplied. He turned his son onto my bread as well, so I added another weekly loaf. Larry sits with his grandchildren on Fridays, so I bake on Thursday and truck the bread up to Larry. (OK, I also grow lettuce and microgreens, and bring some of that along as well).

I’ve been working on the recipe for over a year, and only in the past couple of months added some shortening. It softens the bread, allows it to stay fresh for another day or so, and even seems to give the bread a bit more chew.

This recipe scales well. I have an index card with an ingredients table for one to three loaves. That table is reproduced here:

123
Flour60012001800
Water3607201080
Salt122436
Yeast61218
Shortening204060
Quantities for up to three loaves

The flour I use is King Arthur Organic Bread Flour. I use spring water, fine sea salt, Fleischmann’s Active Dry yeast, and Crisco shortening. I’m truly serious about the flour, and semi-serious about the yeast. Other ingredients can be generic. I buy Crisco out of habit, and buy organic flour not for any perceived health benefits, but for the benefit of the pollinators, without which we would not survive. I find that the shortening does not need to be cut into the dough – it will just mix in nicely. I heat the water in the microwave to about 100F. This offsets the cold of the kitchen and gives the yeast a bit of a jump start.

One loaf is just a little small for the KitchenAid mixer’s dough hook, and two loaves is just a bit too large. Three loaves is out of the question, so I just mix and knead the dough by hand until it’s smooth. I proof the bread until about double, then divide the dough into equal parts, and grease the pans with bacon grease left over from breakfast. The loaves are shaped and put into the pans, and after the final proof, the loaves are scored and baked at 425F for 38-41 minutes in the middle rack. That’s in my oven. Your oven will definitely behave differently.

Tools for Sourdough Breadmaking

I haven’t gone over what I use to make the sourdough. Most of it was already on hand just because we cook stuff, but there were a few specialty (read “expensive”) items that aren’t really needed…

One piece of gear you will absolutely need is a kitchen scale that reads in grams up to 10 kilograms or so. Weighing ingredients is much easier than trying to measure by volume. Another smaller scale that reads in tenths or hundredths of a gram is also helpful for weighing salt ( and occasionally, yeast).

I keep and grow my starter in pint canning jars. (Actually, I’ve found that a particular brand of pizza sauce comes in a perfectly-sized jar that oh-so-handily mates with canning lids.) I keep three jars – one for the current culture of sourdough, another for the next culture (daughter, if you will), and a third to grow a batch of starter to make a leaven. [1]

Hopefully a large bowl is obvious. I use a smaller bowl to make the leaven. I have a couple of plastic shower caps that came from (I think) Caesar’s Palace in Las Vegas that I use to cover the bowls between steps. Plastic wrap works.

[1] There’s an engineering method called the “Rubber Duck Technique”, which posits that if you can explain what you’re making to a rubber duck, then you fully understand what you’re doing. In explaining my need for three jars to you (as proxy for the rubber duck), I realized that I really only need two jars.

Zucchini Surprise

I saw an episode of The French Chef with Julia Child recently, and she divulged a recipe for this dish. I don’t know what she called it, but Peggy actually liked it (surprise!), so that’s what we named it.

I don’t measure so much for this dish. I scale it according to the number of people, and season to taste. That being said, here’s a “recipe” for two people. That’s what I cook any more, so that’s the scale of my recipes.

1 zucchini
1 T butter
1 T chopped onion
1 T flour
2 T cream
Salt & Pepper to taste
1/8 t nutmeg

Grate the zucchini. Lightly salt the zucchini (use great discretion) and drain in a colander. Reserve the liquid.

Melt the butter in a skillet. Add the drained zucchini and onion, and saute.

When the zucchini is nearly done, mix in the flour and reserved liquid, add the cream and nutmeg, and complete seasoning with pepper and maybe just a bit more salt.

Makes ~ 1.5 cups, serves 2 generously


Bread. Yeah, bread.

I just realized I have a pending post from at least a year or so ago (this is 1 SEP 2022), so I’ll post it and continue…

I have been doing a bit of baking during the pandemic, and I’ve been a little experimental while I tried to settle in on a “standard” recipe. I am very close.

Being an engineer warps me a little bit, and watching British baking shows hasn’t helped normalize me, so I tend to make my recipes in milliliters and grams, especially for bread recipes. Flour absorbs water, and that changes it’s weight-to-volume ratio, making it difficult to properly measure flour with a measuring cup. So I use a kitchen scale. I got it at Walmart for about $11. It weighs in grams and lbs:oz, so it’s quite handy.

The provided weights are approximate. If you end up with 53 grams of honey, nothing bad happens. 12 grams of yeast? OK. 510 g of flour? No problem.

The recipe is relatively straightforward, though I do use bread flour and honey, as well as canola oil. You can used all-purpose flour, sugar, and any other oil you have on hand. Bread flour has a bit more protein than AP flour, so makes a bit nicer, chewier bread.

I have been specifically using Bob’s Red Mill Artisanal Bread Flour, and Fleischmann’s Active Dry Yeast. I bought a pound package of yeast in October 2020, and it’s still in use seven months later, though I did get another package the other day. I use active dry yeast because I’m used to it – and – it shows in the proofing stage that it’s still alive. No guessing.

The other really weird thing about this recipe is that I start it in a cold oven. I use the oven for proofing and raising, then just start baking when that is done. Stay tuned for instructions.

Recipe:

275 ml tap water
50 g honey
10 g yeast
10 g Kosher salt
20 g canola oil
500 g bread flour

Grease a standard bread loaf pan. I tend to use bacon grease for this part of the job. It’s what my mother-in-law Evelyn used when Peg was growing up, and the smell of bread with bacon grease makes Peg smile. My job is to make Peg smile, so I use bacon grease. (I also coat the loaf in bacon grease after baking to keep the top supple.)

Measure out the water. Place the measuring cup on the scale and zero (tare) it. Add 50 grams of honey. I microwave the the cup for 50 seconds to get 110-120F water in the cup. Mix in the yeast and set it aside.

In your (one – count ’em – one) mixing bowl, weigh out 10 grams of salt, 20 grams of canola oil, and 500 grams or so of flour. By now the yeast mixture should be active, with a layer of foam over the top. If not, your yeast is dead and you need to make a trip to the store.

Otherwise, mix in the yeast. I just fold it in with a scraper until it’s mostly incorporated, then turn the whole thing out onto a clean surface. Scrape the bowl clean – we’ll be using it for proofing in a few minutes.

Incorporate all loose flour into the dough, and knead the dough for five to seven minutes, until the dough is relatively smooth. The dough should be not quite sticky.

Gather the dough and form into a ball – it should be slightly larger than a softball at this point. Cut a deep (1″) cross in the top of the dough ball (it’s to make the rise more uniform), place it in the bowl, and cover with a clean tea towel or cloth. Put the bowl in a cold oven, and place a pan of hot water (1 quart/1 liter) in the oven next to the bowl. Let this proof for 30 minutes.

Once the dough has doubled in size, turn it out on the counter and flatten it out into a rectangle. Roll the rectangle into a loaf shape. Make the loaf pretty and place in the greased bread pan.

The loaf pan is covered with the tea towel and placed in the oven with new hot water, and allowed to proof until it’s just about 1-1.5″ above the pan rim. Remove the hot water, remove the towel, and make decorative and functional cuts into the bread’s crust if desired. A single 0.5″ deep cut down the center lets the bread rise nicely while baking.

Turn on the oven to 350F, and set a 40 minute timer. Assuming your oven is like mine (it’s within 5F), the bread will be done at that point. Remove from the oven, remove from the pan, and cool on a rack. When still warm but cool enough to handle, brush the top of the loaf with butter (or bacon grease šŸ™‚ ).

Let cool completely before cutting into it.

Bananas were harmed in the making of this Banana Bread.

Banana Bread – Straight-up Betty Crocker recipe from the 1976 version of the Betty Crocker Cookbook. There doesn’t appear to be a publishing mark in the book, but this is the cookbook I bought for Peggy in Christmas of 1976, the year we were married. My mother had a Betty Crocker cookbook, and by gum, Peggy would have one, too. This is one well-used cookbook!

I thought I had a better photo…
  • 2 1/2 C All-purpose flour
  • 1 C granulated sugar
  • 3 1/2 t baking POWDER (that’s 1 T, 1/2 t for those keeping score at home)
  • 1 t salt
  • 3 T salad oil (I used canola)
  • 3/4 C milk
  • 3 bananas, mashed up (about 1 C) [1]
  • 1 egg
  • 1 C chopped nuts (I used pecan)

Preheat oven to 350F. Grease and flour two small loaf pans (or one large loaf pan).

Let the mixer mash the bananas. Mixing slowly, add in the oil, egg, and milk. Add the sugar, nuts, and salt. Mix in the flour and baking powder, combining all well.

Divide batter evenly between the two pans. If you’re an annoying geek like me, you’ll use a kitchen scale to get the weights equal. To within 1/10 of an ounce. :).

Bake for 50 – 60 minutes, until a skewer or knife inserted in the center of the loaf comes out clean.

Please. Let it rest for a few minutes.

Enjoy!

[1] While the original recipe calls for 1 cup of mashed banana (about 2-3 medium), I find that there is no such thing as a medium banana. Also, as an engineer (and a damned Yankee), I don’t like waste, so I use three bananas. It’s about a cup. I know. Betty Crocker is rolling in her fictional grave.

Spatchcocked Chicken

SO easy. SO good. SO moist.

I was at the market doing the weekly shopping and saw a ā€œspatchcockā€ chicken on display, all ready to go. For $18. Right next to it was a chicken likely out of the same hatch, unmolested, for $9. Hey, Iā€™ve got scissors.

Itā€™s rather a pain to remove the chickenā€™s backbone, but a decent pair of kitchen shears makes it an easy task. One day Iā€™ll buy some. I used a pair of blister-pack Walmart scissors to pretty good effect. Just cut down either side of the backbone and remove it. Then place the chicken breast side up and give it a good whack with the heel of your hand ( or a rolling pin!) to flatten it.

I marinated the bird in Kenā€™s ā€œHouse Italianā€ dressing (also touted as a marinade) for about an hour in a gallon plastic bag, in the ā€˜fridge.

I fired up the big Weber as the tiny one is, well, just tiny. The chicken was grilled skin-side down for about ten minutes, and turned. After another ten minutes, it was flipped again. I continued to turn it at five minute intervals until the breast measured about 160F.

Iā€™m gonna have to get a photo booth…

Chocolate Bread Pudding

When I was a kid, and we had stale bread (rare to have any bread with all those mouths…), Mom would whip up a batch of chocolate bread pudding. In fact, it wasnā€™t until after Peg and I married that I found out about bread pudding that didnā€™t have chocolate! Protected life, I guess. (And I strongly suspect Dad arbitrarily declared bread as ā€œstaleā€ whenever he wanted some pudding…).

For some reason I never got the recipe for that. My sisters are going to come back with ā€œwell I have itā€, but Iā€™ve come up with a recipe that I think comes close. It leans very heavily on a recipe I found online:

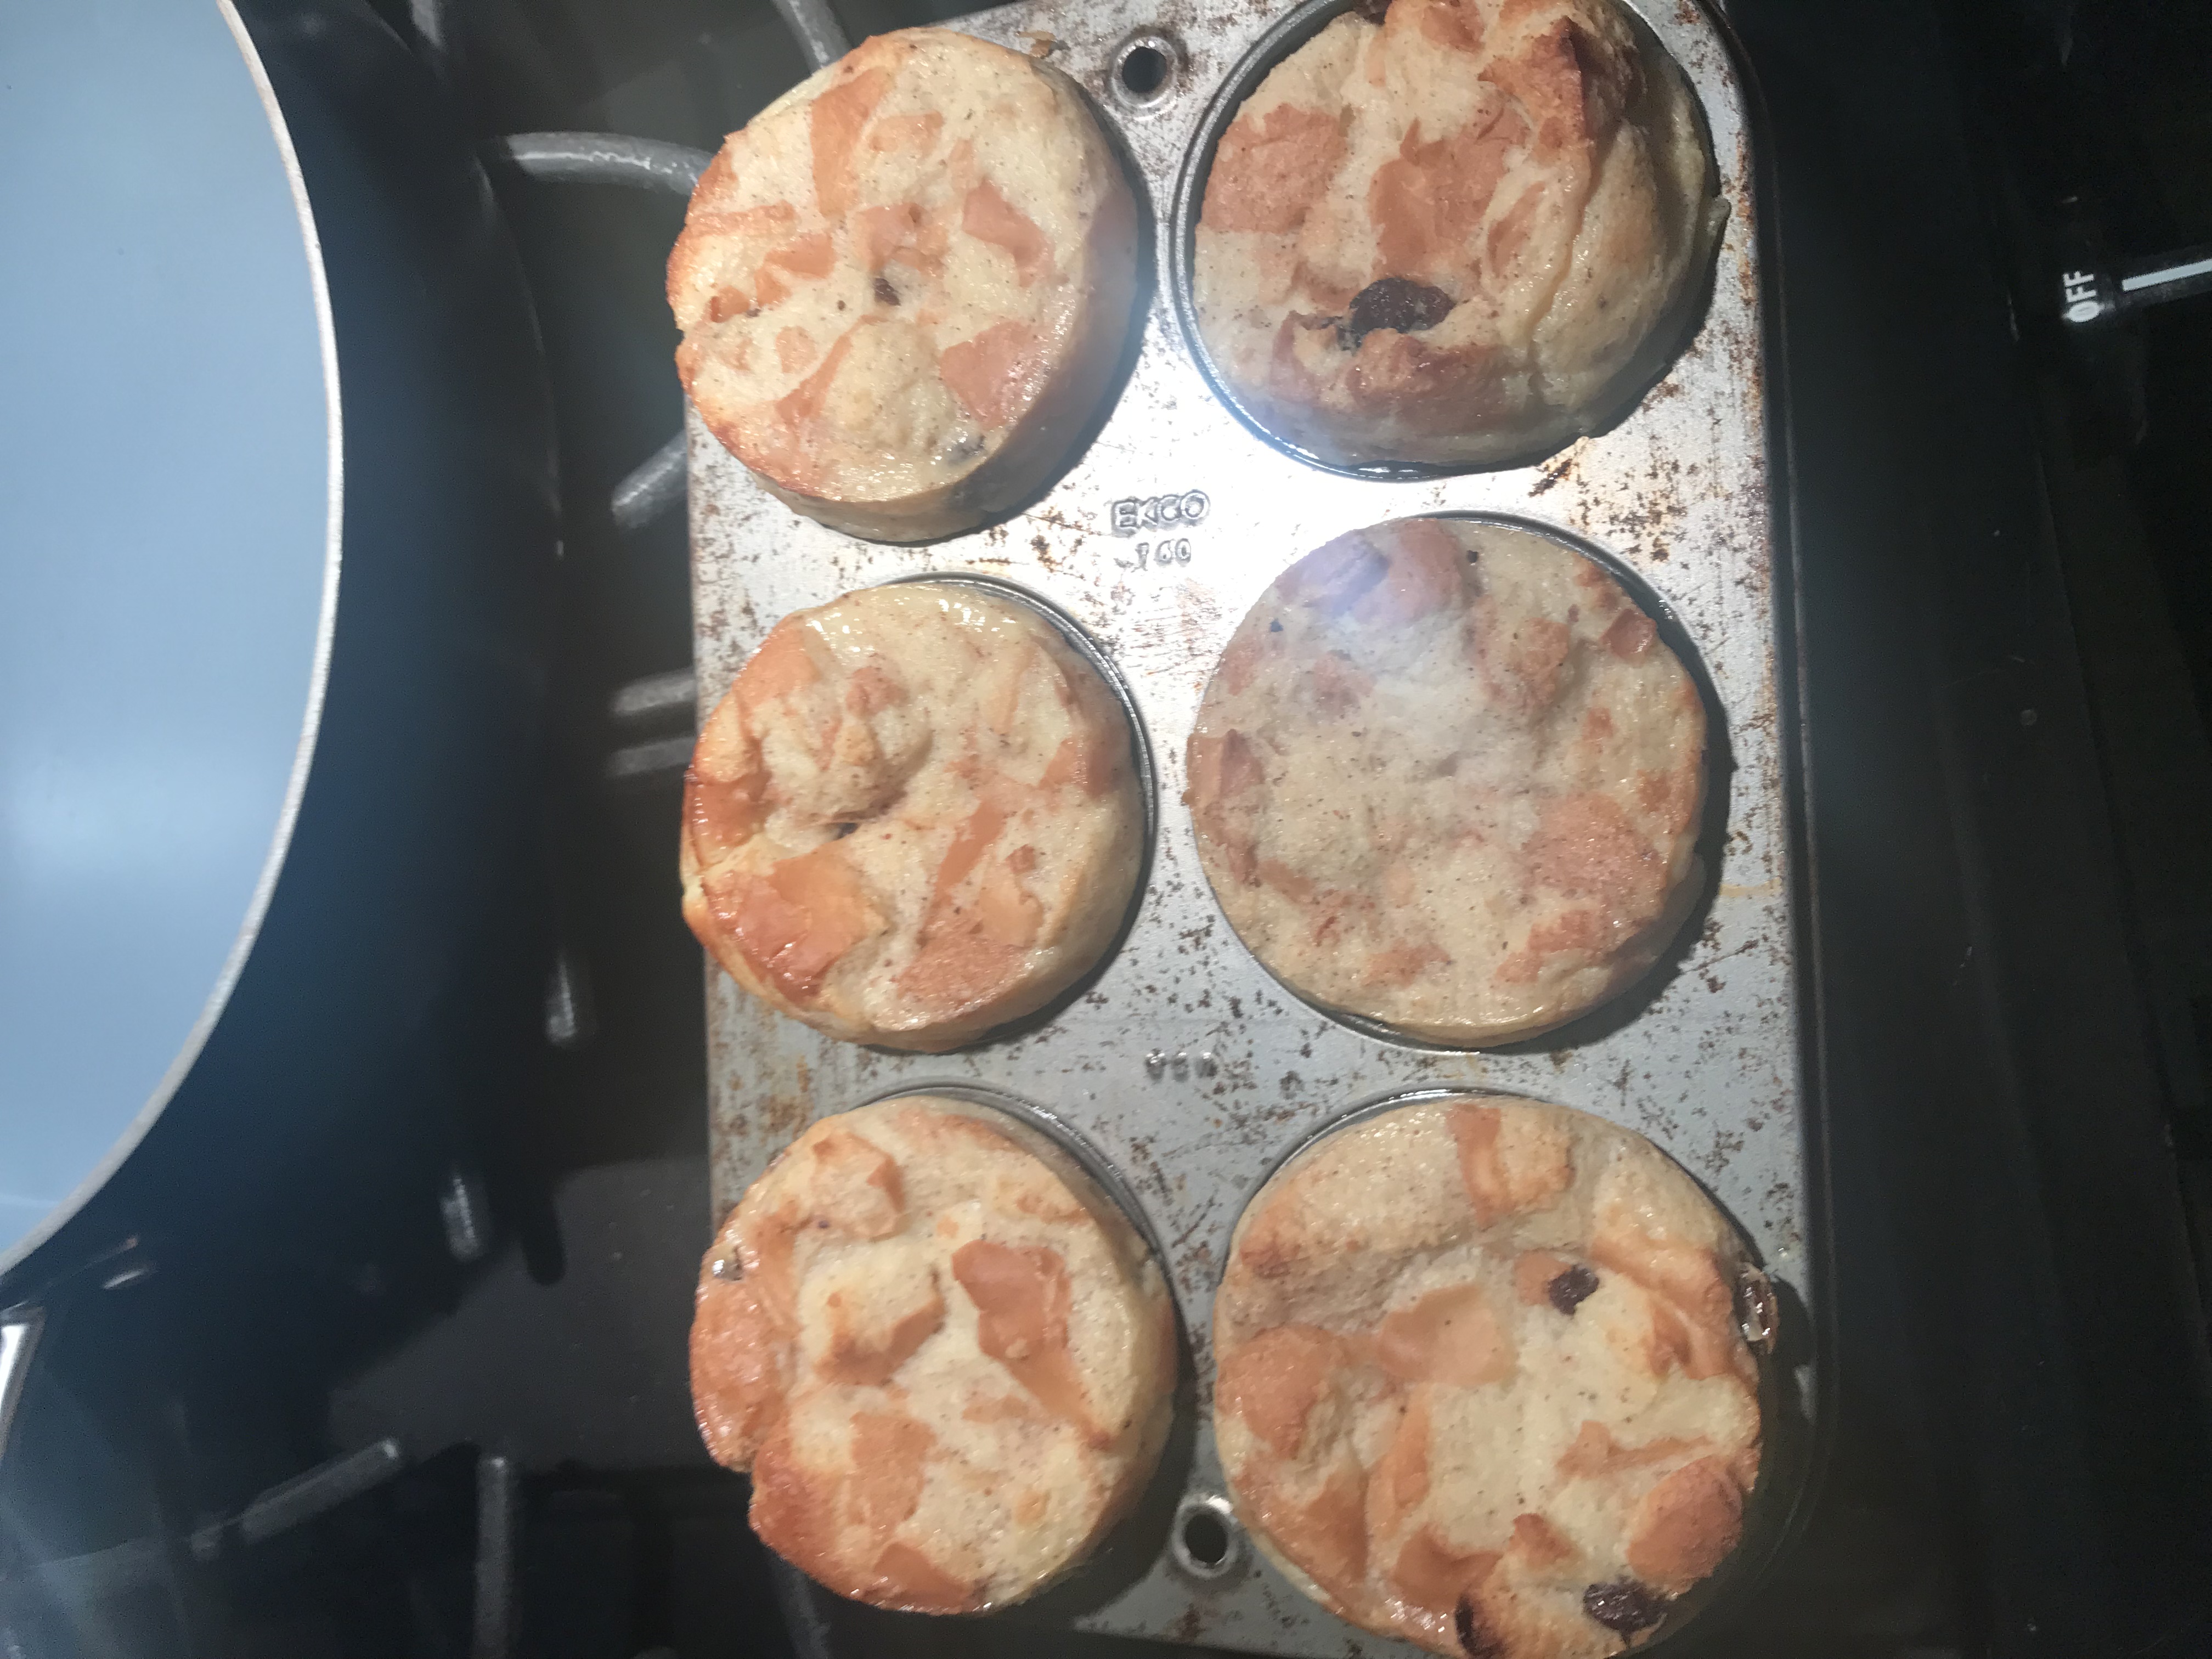
This was excellent, but I increased the chocolate by 25%, the bread by about 30%, and subtly added butter by heavily buttering the baking dish. The original recipe also called for white bread with crusts removed (far too posh), while I opted for a 50 cent day-old loaf of Italian bread, crusts and all. Far more character, especially with that cornmeal from the baking peel.

Here is my version:

Preheat oven to 350F.

  • 2.5 ounces semi sweet chocolate (Bakerā€™s this time)
  • 1/2 C half and half
  • 2/3 C sugar
  • 1/2 C milk
  • 1 large egg
  • 1 t vanilla extract (simply Organic is just lovely)
  • 1/4 t salt
  • 4 C bread cubes
  • 1 T salted butter

Melt the chocolate in the microwave or a double boiler.
In a large bowl, whisk together the sugar, milk, egg, salt, and vanilla extract.

When the chocolate is well melted, stir in the half and half, then combine the chocolate mixture with the milk mixture. Stir in the bread cubes, and let them rest to fully absorb the liquid.

Heavily butter a one quart baking dish (stoneware or glass), leaving the excess in the bottom of the dish. (Subtle, right?)

Bake for 30-40 minutes. A knife in the center should come out nearly clean.

Let it rest for as long as you can stand. Serve with ice cream, whipped cream, or creme Anglaise. Or all of them.

Cornstarch Pudding

Peggy dredged this up from an ancient text (her recipe book when we were newly wed), and it strikes a chord with me. My grandfather Earle was a chemical engineer, and in one of his early jobs worked for Royal Pudding, developing the specific recipe or ā€œformulaā€ used to make Royal chocolate pudding, or so I was told. I think I know what went into the package…

Combine in saucepan:

For chocolate…

  • 2/3 C sugar
  • 3 T cocoa powder

For vanilla…

  • 1/3 C sugar

For all…

  • 1/4 C cornstarch
  • 1/8 t salt

Whisk dry ingredients together, then whisk in

  • 2 3/4 C milk

Stirring constantly, bring this mixture to a boil. Boil about a minute, until pudding thickens. Let pudding cool slightly, then whisk in:

  • 1 T vanilla extract
  • 2 T butter

Serve warm or cold. Pudding can be covered with plastic wrap to prevent the formation of a skin.

The original recipe page

I havenā€™t made this in years, but itā€™s a damned inexpensive treat for poor newlyweds!

Evelynā€™s Rice Meatballs (Porcupines)

The original recipe card. Sis (Evelyn) typed that up on Pegā€™s typewriter.

Another recipe dredged from the annals of history. Along with my grandmotherā€™s recipe for doughnuts, this old favorite was found as Peg was rifling through one of her old recipe books. Itā€™s one of very few recipes her mother, Evelyn, ever wrote down.

  • 1 C Minute Rice
  • 1 lb ground beef
  • 1 egg, slightly beaten
  • 2 t grated onion
  • 2 t salt
  • 2 1/2 C tomato juice, divided
  • 1/2 t sugar
  • 1/4 t pepper

Reserve 2 C of tomato juice and sugar. Combine other ingredients. Form into 18 equal-sized meatballs. Place meatballs in a skillet. Mix the sugar and remaining tomato juice, and pour over meatballs.

Bring to a boil, then reduce heat. Simmer covered for 15 minutes, basting occasionally.

Grandma Roseā€™s Doughnuts

Oh, I remember these from my youth. I never got to meet my maternal grandmother, but Mom used to make these all the time for Dad. I was thinking about them a couple of weeks ago, wondering whether any of my sisters had the recipe. Unfortunately, all three of my sisters have recently moved residence. If they are like me (I suspect as much) the recipe books are hidden away in boxes that wonā€™t be found until the next millennium…

Peg just happened to be thumbing through an old recipe book of hers. Lo and behold, this recipe showed up, along with several other treats from the past, like her motherā€™s recipe for ā€œrice meatballsā€, also known as ā€œporcupineā€ meatballs. I just call that good karma…

But, for the doughnuts…

Mix together:

  • 1 egg
  • 1 C sugar
  • 1 C sour milk
  • 1 1/2 T shortening

Add:

  • 4 C flour
  • 1 3/4 t baking soda
  • 1 3/4 t cream of tartar
  • 1 1/2 t nutmeg

For glaze, mix 1/3 C boiling water to 1 C confectioners sugar.

Roll out dough on a lightly floured surface to 1/2 inch thick. Use doughnut cutter to cut doughnuts (and hole!). Re-roll scraps to make more donuts, and the final scraps can be fried as-is odd shapes.

Heat several inches of shortening in a deep skillet or fryer to 350F. Fry doughnuts until golden brown on one side, the flip and fry the other side.

Drain on rack over paper towels. Glaze when cool.

The original – but whose handwriting is that?