While I’m thinking of it, I’ll work up what I do to make sourdough bread. Sourdough, to me, anyway, is the technique of using wild yeasts and bacteria to leaven bread. (Don’t be confused. There is a step in which a levain is created. This is just the French term for a pre-fermented portion of the dough. It creates a great deal of flavor.) Sourdough bread does not need to be sour. That one of the aspects that can be controlled. I don’t like the sour bit so much, so I try to control it out to a certain extent.
Anyway, this is my method. The recipe varies somewhat, and follows. These instructions produce two loaves of bread. It’s going to be a bit different this time around as I’m making one loaf and however many rolls I can get out of it for Thanksgiving. Rolls for Thursday means baking on Wednesday. Which means I start on Sunday.
Note that most of my measurements are in grams, not cups and teaspoons. There are two primary reasons for this, and they likely have equal weight, if I’m perfectly honest. One, weighing everything helps in reproducibility. I can make the same bread every time if I’m within a gram or two. Two, I’m lazy. I can weigh everything into one bowl. No cups or teaspoons to wash. And, I don’t have to fiddle with or worry that I’m not getting just the right amount of flour into the cup. (Given my tendency to leave the dishes for Peggy, this results in a higher level of matrimonial bliss.)
Day -3: (baking in three days)
Feed the starter and build the bulk starter. I only keep a starter of about 50 grams, and I need 100 grams to make the levain. So I “step up” the starter, and call it bulk starter. I don’t know what other people call it. If I baked more often, I would just keep a bulk starter going all the time, but I’d have to bake every three or four days to justify it.
Day -2: (baking in two days)
Make the levain, which is combining more flour and more water with the bulk starter. This will ferment overnight and create a huge amount of flavor. This step also increases the amount of yeast available to make the bread rise. In bakers’ terms, this is a “pre ferment”, in that a portion of the dough (the levain) is fermented prior to making the bread.
Day -1: (baking tomorrow – making the bread today)
Autolyze the remaining flour, which allows the development of gluten without all that tedious kneading. All that work your mother taught you to do is only hydrating the flour. Just letting it sit for two hours does the same thing. Go have a coffee.
Make the dough by combining the autolyzed flour, salt, and levain.
Fold the dough twice to provided structure and tension to the dough.
Proof dough until about doubled in size.
Divide dough into loaves and pre-shape into rough loaves.
Shape dough into final loaves and place in tins or bannetons
Proof dough – tins until ready to bake, bannetons just shy of that
Refrigerate dough in bannetons (or bake the bread in tins)
Day 0: (baking today)
Preheat oven to 450F
Pull bread out of fridge
Score bread
Bake bread with steam
Let bread cool
These are my ingredients:
fine sea salt – it dissolves more easily than the coarse stuff
spring water – filtered would also work, but geez, avoid the stuff with chlorine in it.
flour – Not just any flour, though. I use bread flour, what the British call strong flour. It’s simply flour that has a relatively high protein content, from 12-14%, versus 9-11% for all purpose (AP) flour. Whole wheat flour adds texture, flavor, and protein. Whole wheat is also the base of my starter. Rye adds flavor (that apparently some of us don’t like so much.) The amounts are included below, but here is a list of the flours I use, just to be organized:
King Arthur Organic Bread Flour (12.7% protein)
King Arthur Organic Whole Wheat Flour (13.8% protein)
Bob’s Red Mill rye flour
John rants: I use organic ingredients not because I think they are superior to, or in any way are more healthy than, “ordinary” foodstuffs, though that’s probably true. I use organic whenever I can to protect the pollinators, all of which are endangered by the indiscriminate use of pesticides.
Bread doesn’t stick to the basket when dusted with a mixture of rice flour and bread flour. Bread slides on the peel when the peel is dusted with cornmeal. (So that’s why my bread has cornmeal on the bottom…)
Bob’s Red Mill cornmeal
Bob’s Red Mill rice flour
Now, to make bread:
To make the bulk starter(Day -3)( 10-15 minutes):
- 5 grams starter (50/50 mix of whole wheat flour and spring water)
- 60 grams whole wheat flour
- 60 grams spring water
To make the levain(Day -2)(10-15 minutes):
- 100 grams bulk starter
- 120 grams spring water
- 180 grams bread flour
The autolyze (Day -1)(15 minutes):
- 75 grams rye flour
- 75 grams whole wheat flour
- 620 grams bread flour
- 530 grams spring water
Finally, the dough ( Day -1)(30 minutes):
- 20 grams fine sea salt
The starter is a 50/50 mix of flour and water (give or take whatever biological action take place), so 100 grams of starter is 50 grams of water and 50 grams of flour. Thus the levain consists of (180+50=230) grams of flour and (120+50=170) grams of water.
To that we add another (75+75+620=770) grams of flour and 530 grams of water, totaling 1000 grams of flour, 700 grams of water, and 20 grams salt.
In so-called “bakers’ percentage”, this dough is considered 70% hydrated, because there is 70% as much water by weight as flour : 700 g water / 1000 g flour = 70%. Salt is usually added at about 2% of the flour weight – 20 grams in this case.
Now the details. The times are merely rough guidelines. Your kitchen may be warmer or colder than my kitchen, and temperature matters. A lot. Warmer kitchens tend to promote faster yeast and bacterial action. Not surprisingly, colder kitchens slow things down. So this is a game of watching the dough, listening to what it’s telling you. All ingredients are at room temperature, which varies probably 60-70F during the winter in my kitchen.
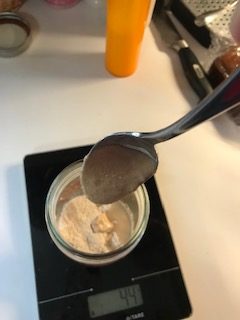
Day -3: Making the bulk starter is easy. If you feed your starter at the same time, there’ll be no extra dirty dishes. It’s the only sensible thing to do. My recipe calls for 100 g of starter for Day -2. 60 g of whole wheat flour and 60 g of spring water are combined with a bit of starter. Mix it well and loosely cover for about 24 hours. Tomorrow there will be enough starter to make the levain. These pictures are clearly of making the starter. The bulk starter is just three times bigger. I tend to do this step before going to bed.
Day -2: Still a pretty easy day, making the levain. Measure out 100 g of bulk starter into a bowl. Measure out 120 g of spring water, and mix well with the starter. Mix in 180 g of strong white flour until all of the flour is combined and no dry flour remains. Cover and leave for 12 hours or so. I also do this before going to bed to allow breadmaking to start after breakfast. Yes, retirement is nice.
Day -1: Making the bread consists of a number of steps, each of which is easy. We just have to combine them. Your levain has been growing for about ten hours, and will be in peak shape in another two. It’s time to autolyze the flour. Weigh out 770 g of flour – my normal mix is 75 g rye, 75 g whole wheat, 620 g bread flour – into your bread bowl. Weigh out 530 g of spring water. Weigh out 20 g of fine sea salt. I measure the salt at this point because I forgot it once. Never forget salt in your bread. Never. Really. Never.
Mix the water and flour until all the water is absorbed and there are no dry bits of flour. This is the autolyze step, which allows gluten to develop without all that tedious kneading your mother taught you. Cover the bowl and go have a coffee, or run an errand.

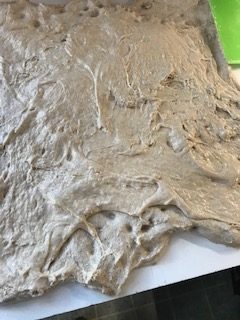
Autolyze for thirty minutes to two hours, then turn the dough out onto a wet counter. Wet your fingers, then spread the dough out into a large rectangle, like making pizza.
Dimple the dough with your fingertips, and sprinkle the salt evenly over the surface. Turn the levain out onto the dough, and spread it out evenly.
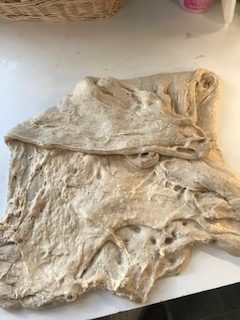
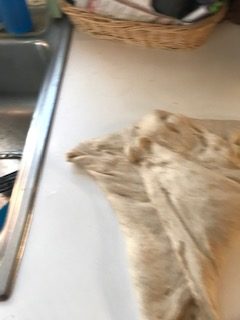
Use a bench scraper to fold the dough from the edge to the center, overlapping to contain the levain, keeping your fingers wet to keep the dough from sticking too badly.
Pull the dough toward you, stretching it, and fold it back over itself. Turn the dough, and repeat this folding action until the levain is mixed in and the dough is a homogenous mixture. Scrape the counter clean and place the dough in the bowl to rest for 20 minutes.
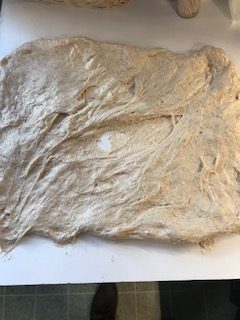
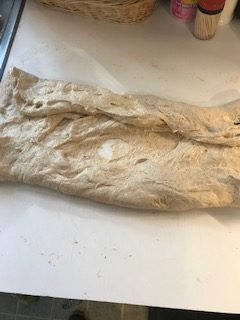
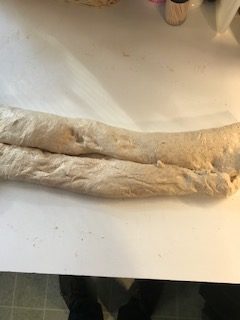
The next two steps are simple folds: wet the counter and your fingers again, and turn the dough out. I like to spread the dough out like a square pizza. Then I fold one-quarter side to the middle, then the other quarter to the middle.
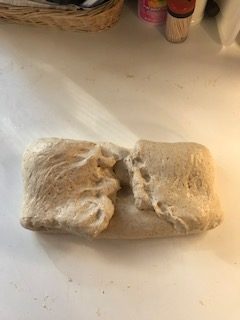

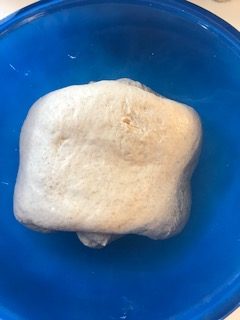
Fold the ends in toward the middle again, then fold that. Put the dough back into the bowl for another 20 minute rest, with the outside of the fold facing up. This is now the “good side” of the bread.
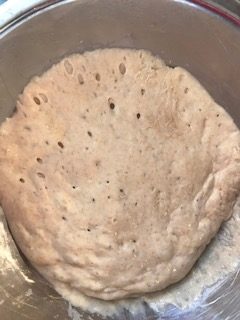
After resting for twenty minutes or so, do another fold as before. Put the dough back into the bowl for proofing again with the “good side” up. Leave the dough in the bowl on the counter until it has about doubled in size. Flour the counter, flour the dough in the bowl, and turn the dough out onto the counter. Weigh the dough and cut into two equal portions. Preshape each portion into a rough loaf, cover, and set aside to rest for 20 minutes.
Place the loaves in bread tins for baking after another proof. When the bread has again almost doubled in size (the crown should be peeking out of the bread tin), it’s time to bake. 375F for 30 minutes? I am guessing. I’ll have to test that.
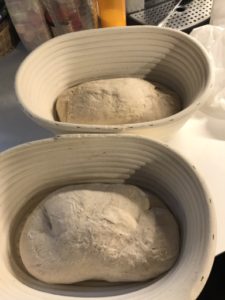
Or, place the loaves in bannetons, wicker baskets made for proofing and fermenting sourdough bread.
The bannetons are dusted with a mixture of wheat and rice flour, and the loaves are place good side down.
After the bread has about doubled in size (the dough should yield to a finger, and should not spring right back), the bread is refrigerated at least overnight, to develop flavor as it continues to ferment. The action of the yeast is reduced, but the lactic acid bacteria that produces the sour taste continue to work. Longer fermentations produce more sour taste due to more bacterial action.
After their overnight stay, the loaves are scored and baked on a preheated pizza/baking stone at 450F for 40 minutes. Steam is added at the beginning of the bake (a cup of water in a preheated Dutch oven lid) to ensure a crispy exterior. Alternatively, a round boule can be baked in a preheated Dutch oven. When the oven beeps to indicate it’s up to heat, the cast iron Dutch oven will still be cold – give it at least a half hour. Then roll the boule out onto a square of parchment, score, and lower it into the Dutch oven and cover. Bake for 20 minutes, remove the cover, and bake for another 20-25 minutes.
Scoring the crust of the bread creates a path for the bread to expand while it bakes. If you haven’t supplied an easy path by scoring, the expansion will occur in random places – this rarely makes for a pretty loaf of bread. I use a razor blade, and try to cut at least 1/2″ (12mm) deep into the crust. Shallow cuts can be decorative, but a deep one is needed for expansion. Bread baked in tins don’t require scoring, as the sides of the tin prevent expansion out, to it has to go UP.
There is a lot more detail to it in practice, but following these steps will result in bread. And pretty good bread at that. It will only improve.
Thanks for stopping by.

